EnviroKarma.org - Electric Vehicle (EV) Conversion '...it's (NOT) hard to be Green' - what Kermit should have said


Click to receive email when updates are posted to this page:
Powered by ChangeDetection.com

Vacuum Brake System for the Suzuki Swift (Geo Metro/Pontiac Firefly)...

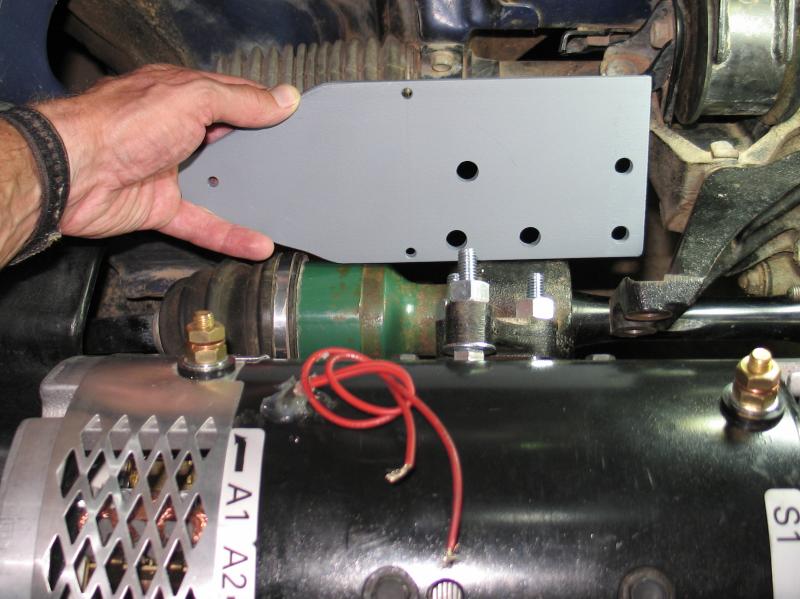
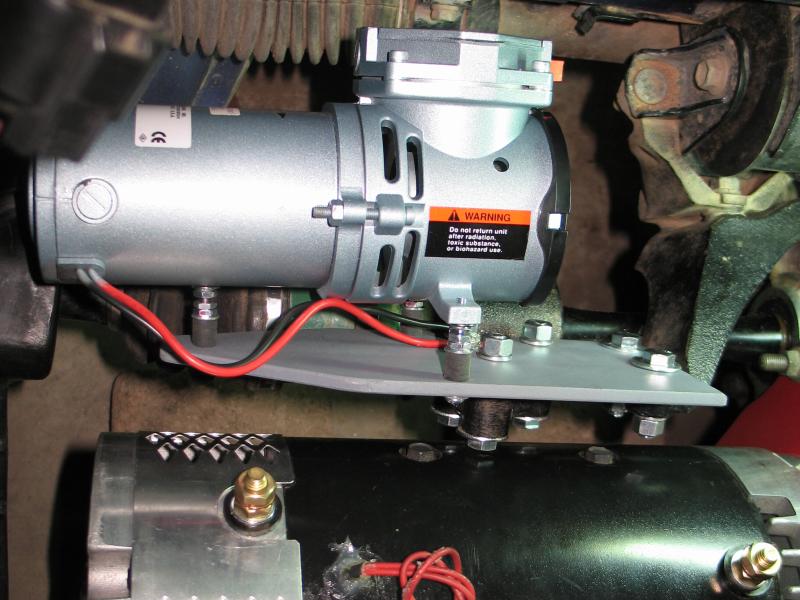
    Another one of those items that does not come in the kit.... The bracket plate to hold the center axle bearing to the rear transmission mount. It looked like there was room to combine this with a mount for the vacuum pump; which I thought was a great idea since the rubber mounting would further isolate the vibration.

    For this bracket, I used a piece of 1/4"x4" flat strap and hardware required was (5) 3/16 - 1-1/2" bolts, nuts, lock washers, washers. I also used 3 larger nuts as spacers. It is VERY IMPORTANT that the screw going into the motor body does not go in too far as this will interfere with the motor, and it won't turn! Be sure to screw in just thru the casing, and lock in place with a nut....

    After one year...Turned out that mounting the pump at an angle was NOT a good idea... over time the vibration fatigue sheared the bolts and the pump was left hanging by the hoses. Next time I would find a place to mount horizontlly, or perhaps suspended in some pipe strapping. I did retro-fit with some strapping, and will add some pix eventually.

    I did trim up some of the extra corners with a sabre saw... just to make a little extra room to clear the CV boot.

    At this point I decided to do a quick paint job on the firewall in one area that had a little rust... and then once I got going I just went ahead and did most of the engine bay. Kind of a slop job with no masking or anything, but it did make it look better and should protect a couple spots that were scratched or had small areas of rust. I probably should have done this before installing the motor!

    While I was waiting for the paint to dry, I crawled under the dash to see if I could pull out the old heater core. Turns out that is a MAJOR job. It looks like the electric heater will go in the middle of the duct close to the fan so I don't have to pull apart the dash.

    The next challenge was to find good spots for the pressure switch and vacuum tank. I wanted to leave as much of the center area open as possible for possible electronics box or battery placement. After some consideration, and looking carefully for available pre-drilled holes in the chassis. I wanted to re-use predrilled bracket holes if possible.... and found some good ones on the driver's side rail for the switch. I did have to do some minor modification of the switch bracket to bend it a little to get the bolts to snug down nicely.

    After just a little bit of consideration and hunting around for existing slots or holes, I found that the tank fit very nicely on the bracket that was originally for the fuel vapor recapture tank. I bent the tabs out to allow easy access for the zipties, and 'dented' the center a little to form around the tank better. I happened to have some adhesive foam insulation tape, so I stuck that between the firewall and tank to prevent rattles... Then I plumbed it all together with the hose supplied with the kit. I was concerned that the hose would not fit over the brake tank itself since the hose was larger, but after warming the new 1/4" hose with my plastic welder, it was pliable enough to jam on. I would guess that a hairdryer or paint stripper would get plenty hot enough as well.

    So... the whole vacuum system took about 5.5 hours including the design of the axle plate, but NOT including the time to take a run to the hardware store for the extra brass and plastic fittings.

    One important note to consider when you are setting your vacuum switch operational range is your local maximum elevation.... At SEA LEVEL the Gast will produce a max vacuum of about -23 in-Hg. I found out that value is de-rated about 1 in-Hg per 1000' ft elevation. In my case, at 7500 ft, the pump cannot draw down less than -14 or maybe -15, and takes a long time to get the last bit. I ended up setting mine to switch off at -13inHg since it gets there pretty quick. I get two pumps of the brake, and it fires up and draws back down to -13 in about 15-20 seconds.


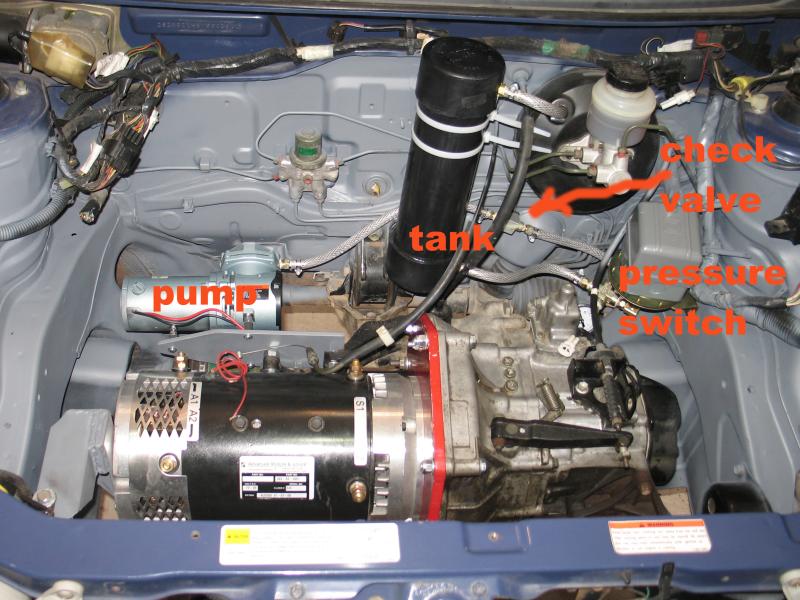
Vacuum pump mount plate: 3.5 hours
(lots of measuring and a couple false starts on layout.)
pressure switch and bracket: 1 hour
tank and hose: 1 hour
-----

total: 5.5 hours


Web Site Design and Maintenance By Emerging Technology Services

Disclaimer of Liability and Assumption of Risk: Working with high voltages in electric vehicles can be dangerous. Working with welding equipment or plasma torch or sawzall and other power tools necessary to fabricate battery racks or create holes necessary to lay the battery racks within an electric vehicle can be dangerous. The purchaser/builder solely assumes all risk. Further, the viewer of this site, and builder of the vehicle, agree to hold harmless Daniel T. Baker and any associates from all loss, liability, or damage resulting from any failures or defects in any project completed with these instructions. It is suggested that the builder follow common-sense safety procedures, such as the utilization of gloves where working with high voltages, and ear protection and goggles when working with power tools.