EnviroKarma.org - Electric Vehicle (EV) Conversion '...it's (NOT) hard to be Green' - what Kermit should have said


Click to receive email when updates are posted to this page:
Powered by ChangeDetection.com

Mid Battery Rack for the Suzuki Swift (Geo Metro/Pontiac Firefly)...

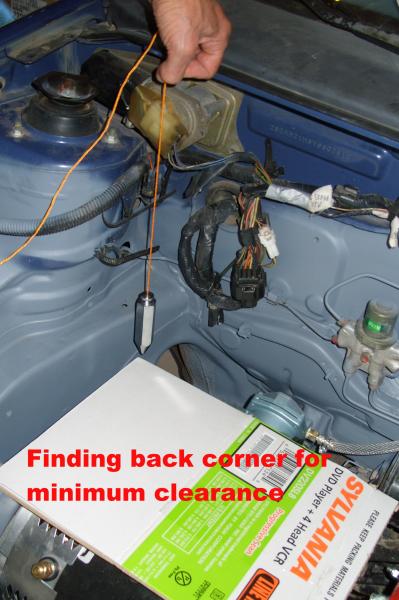
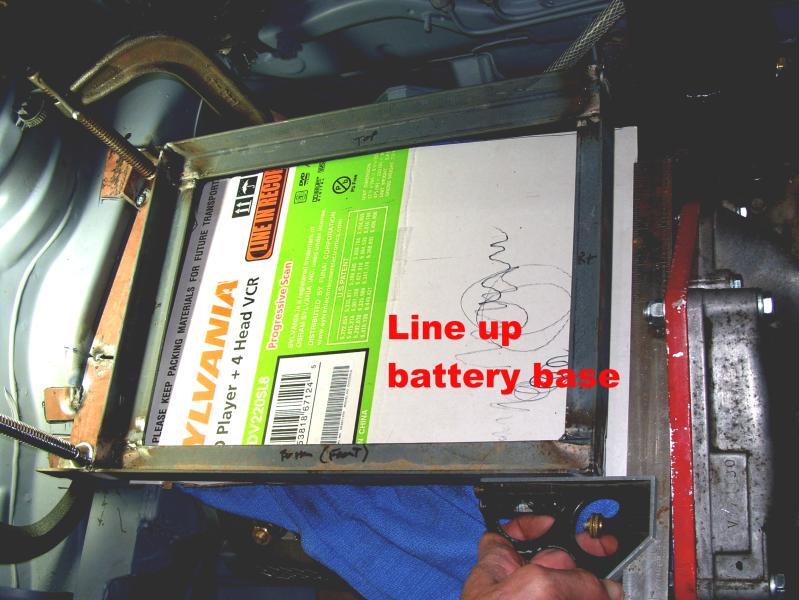
    After the decision was made to put two batteries 'over' the motor, and span the engine bay for the rack and component shelf the design developed... I started at the left with the goal to put the batteries as far left and back as possible. I am hoping to minimize the hood modifications, and place the controller such that the air stirred around by the motor and coming in from the scoop help with cooling. A preliminary layout shows that the US Battery 8vgchcxc batteries are going to interfere with the hoodline, so I am prepared to build some kind of a scoop and direct the air past the controller instead of using fans.

    The left bracket and battery box base fell into place using available mounting holes in the chassis rail; allowing a little gap between the bottom for batteries and motor I clamped things into place so I could start from the right side and bridge the gap. To maximize usable space I decided to create an offset in the base of the span. This meant I had to complete the battery box and right bracket first then layout the rails to complete the span. After jumping on the middle with carefully calibrated weight aproximating the two batteries and remaining components (me jumping up and down in the middle of the span), I decided to add a diagonal cross brace which will give me a place to build a back plate to mount components and beef up the span. It is solid as a rock now....

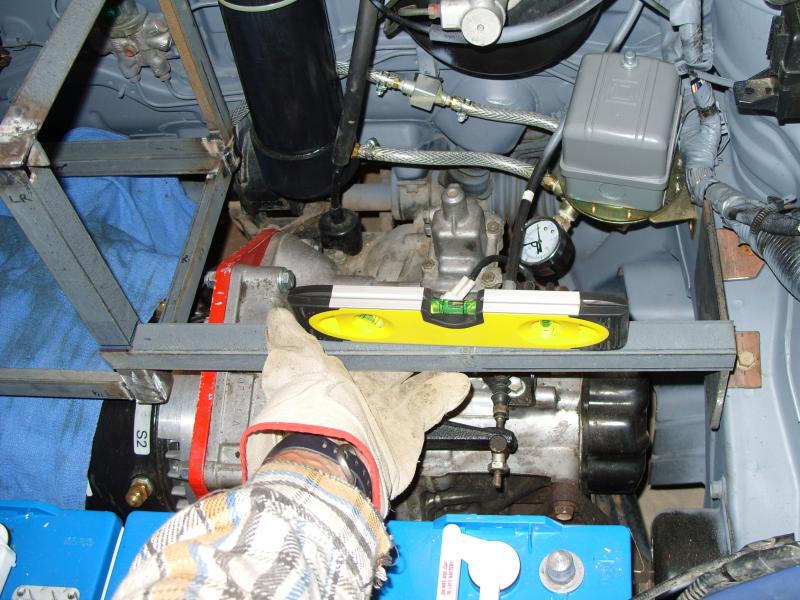
    Using all 1x1 angle for construction might be slight overkill and add a couple extra pounds; but considering that this rack has to span the engine bay and support probably 200# of 'stuff', I really don't want to risk it collapsing. The 'empty weight' of the steel rack is right around 20#.

    ...and then it will take some more time to add components... which will be on another page.

    NOTE After assembly, it turned out that the hood ALMOST cleared the mid rack without cutting a scoop hole. I did cut out the internal braces, and 'bump' the hood for clearance. If I were to do this model Swift again, I think I would design the mid-rack a little differently so the top rail is below the top of the battery, and not go to such great pains with the controller rails to fab as an active air scoop.


Time to construct racking : 12.5 hrs


Web Site Design and Maintenance By Emerging Technology Services

Disclaimer of Liability and Assumption of Risk: Working with high voltages in electric vehicles can be dangerous. Working with welding equipment or plasma torch or sawzall and other power tools necessary to fabricate battery racks or create holes necessary to lay the battery racks within an electric vehicle can be dangerous. The purchaser/builder solely assumes all risk. Further, the viewer of this site, and builder of the vehicle, agree to hold harmless Daniel T. Baker and any associates from all loss, liability, or damage resulting from any failures or defects in any project completed with these instructions. It is suggested that the builder follow common-sense safety procedures, such as the utilization of gloves where working with high voltages, and ear protection and goggles when working with power tools.